How to create events
Once you have installed Google Analytics, you can start tracking events. There are 2 main ways to do this:
Google Tag Manager using data track attributes
This mechanism allows you to use data attributes in your HTML to communicate with GTM, and send events and event data to GA. This is our preferred method for event tracking for the following reasons:
- Only 1 tag in GTM is needed, rather than a tag for each event
- Control of event implementation is with the code owners
- The tracking intention is clearly visible within the HTML
- It relies on robust selectors (as opposed to custom selectors in GTM)
- It is a generic abstraction so is not technically tied to any specific analytics tool
- Link data, such as URL and link text are automatically captured
- GTM is set up for use with this in our example containers
How data-track works
First, you will need to have the relevant tags, triggers and templates within your GTM container.
If you don't already have them in your container, you can import this data-track.json file. Note that this contains references to triggers and variables that are part of consent mode. If you don't have consent mode, you must implement it first. If you are unsure, contact Ask Frontend Enablement in Teams.
The relevant GTM items are as follows:
| Name | Type | What does it do? |
|---|---|---|
| SpringerNature - Data Attribute Event API | Custom template | Responsibly injects the <script> element that requests the data-attribute-api.min.js JavaScript file |
| GA - Setup Data Attribute Event Tracking | Tag | Initialises the above template. Fires when the DOM is ready or consent is updated |
| GA4 Event (data-track) | Tag | GA4 event tag, populated with the data that the data track code pushes into the Data Layer |
| Event - track | Trigger | This trigger hooks off of the track event that is pushed to the Data Layer when the user interacts with a tracked element |
Technical details
The data-attribute-api.min.js JavaScript file is the compiled output of JavaScript code owned and maintained by Frontend Enablement.
The code adds click, change and submit event listeners to the document. The event handlers take the target element (event.target), and loop up through the DOM looking for an element with a data-track attribute. If an element is found, it gathers the data from the data-track and data-track-* attributes that are set. The value of the data-track attribute is the event name, and the data-track-* attributes are event parameters. Examples can be found in the "usage examples" section.
The data from these attributes is pushed into the Data Layer, along with some automatically generated data. If the element is a link, we will push the link URL and the link text into the Data Layer.
Because event listeners are on the document, the events from the element that is interacted with must bubble.
If your code calls event.stopPropogation(), this will stop the event from bubbling and the event listener on the document won't hear the event.
This is most commonly found on forms. If you want to prevent the default behaviour of an element, use event.preventDefault().
This won't affect the event bubbling.
Dynamically added elements
Because our event listeners are attached to the document element, elements that have been added to the DOM via your JavaScript will still work with data track.
Forms
Forms are one of the trickier parts of event tracking. It is always preferable to listen to the form submit event, rather than the submit button click event. This is because clicking a submit button doesn't necessarily mean that the form is submitted, for example, if the form has client side validation. This could lead to events being recorded as successful submit events when they weren't.
As such, the data track JavaScript prioritises the submit event. If you have the data-track attributes on the submit button instead of the form and you are not seeing your event come through, check the browser console for a warning suggesting you place the attributes on the form element instead.
If you specifically want the click event on the submit button to be tracked, then you will need to add data-track-prefer="click" to the element.
When tracking forms, it is important to be clear on what you want to track and why. Events like a user selecting a radio button are likely to be meaningless, because the user could change them several times before actually submitting the form.
In most instances, an event name for the form submission itself is sufficient. But if required, you can dynamically populate data-track- attributes on the form element with data.
File downloads
The data track JavaScript code handles file downloads differently to other links.
If the JavaScript is loaded on the page, then any link with a download extension will push an event called file_download into the Data Layer.
Valid extensions are .7z, .avi, .csv, .doc, .docx, .exe, .gz, .key, .mid, .midi, .mov, .mp3, .mp4, .mpeg, .mpg, .pdf, .pkg, .pps, .ppt, .pptx, .rar, .rtf, .txt, .wav, .wma.
.wmv, .xls, .xlsx, .zip.
This is done to cover a nuance in GA, where the automatic tracking of file downloads doesn't allow for custom parameters to be passed. We recommend switching that off, and using the data track JavaScript to handle this. Our approach also also custom naming of file download events, which is important for our key events in GA.
The default file_download event name will be overwritten if you do set a data-track attribute on the download link element.
Usage examples
Custom file download event
<a href="my-download.pdf" data-track="content_download" data-track-context="Article sidebar">Download PDF</a>
GA recommended event - share
<ul>
	<li>
		<a href="path/to/content" data-track="share" data-track-method="facebook">Facebook</a>
	</li>
	<li>
		<a href="path/to/content" data-track="share" data-track-method="twitter">Twitter</a>
	</li>
	<li>
		<a href="path/to/content" data-track="share" data-track-method="whatsapp">whatsapp</a>
	</li>
</ul>
Form submit event
<form data-track="signup_newsletter">
	<input type="email">
	<button type="submit">Sign up</button>
</form>
Note that the data track JavaScript code does not validate the attributes that are added to the HTML element. It is only responsible for pushing data from attributes into the Data Layer.
Validation happens via GTM and GA. If the attribute is not mapped to a parameter in the Google Tag in GTM, or if the GA property that data is being sent to has not added the custom parameter in its configuration, the data won't be sent.
For example, if you set 10 data-track-* attributes on your HTML element, but if only 6 custom parameters are mapped in GTM / defined in the GA property, only those 6 will be sent.
Only GA property admins have permissions to add new parameters. If you require additions, please reach out to the 'Ask Web Analytics' channel in Teams.
Migrating legacy events to GA4 events
By default, legacy events will also be sent to GA4, but the event name will be the value of the data-track attribute.
This ensures that no data is lost, however, it's not particularly useful as GA4 is fundamentally based on meaningful event names.
To mitigate this, and to speed up the process of migrating events to GA4, we have a utility that can be used.
Within the data-track value, you can use a double pipe separator || to indicate that the value on the left is Universal Analytics, and the value on the right is the GA4 event name. Because our GA4 setup accepts the data-track-action, data-track-category, data-track-label and data-track-value attributes, these will all be sent along with your GA4 event. You can also add additional GA4 specific attributes.
Example
<a href="#"
   data-track="click||click_submit_manuscript_button"
   data-track-action="submit manuscript"
   data-track-category="journal header">Submit manuscript</a>
This will result in an event being sent to Universal Analytics, and a separate event named click_submit_manuscript_button to GA4.
Google Tag Manager using GA4 event tags
Although using data-track attributes is our recommended approach to event tracking, there are occasions where it is appropriate to create events within the GTM interface. There are some key points to remember when doing this:
- Containers can become very busy / messy if there are a lot of event tags in them
- Event names and parameters should still follow the guideines
- Events must not fire without the users consent
Create a new tag:
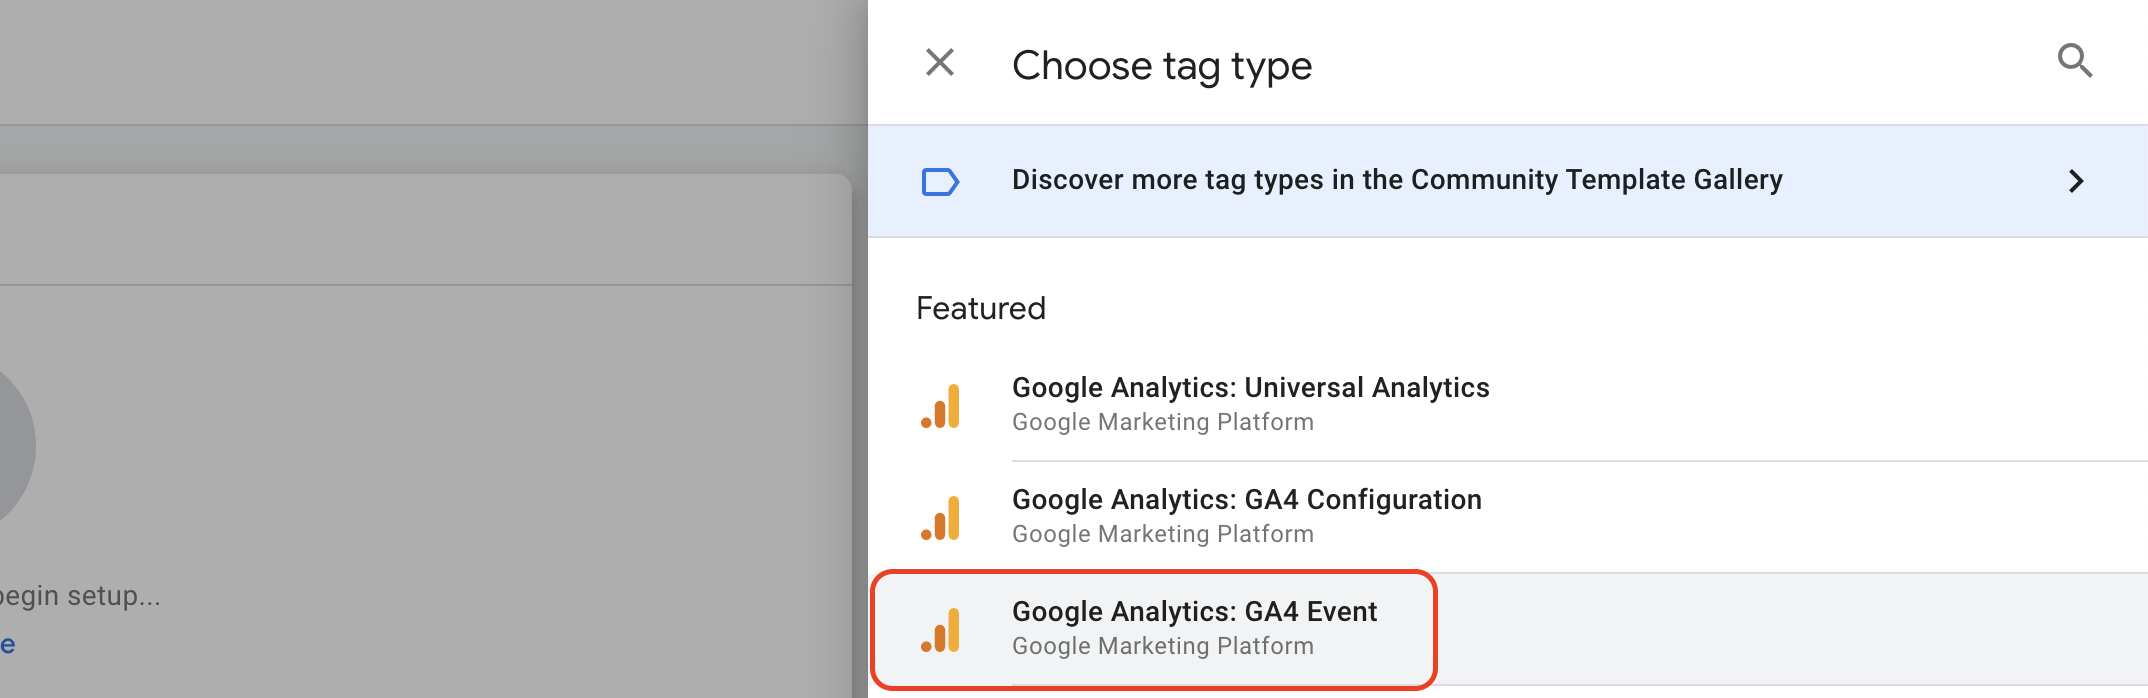
Configure the tag with the information required, following the event guidelines regarding event naming and event parameters as detailed above.
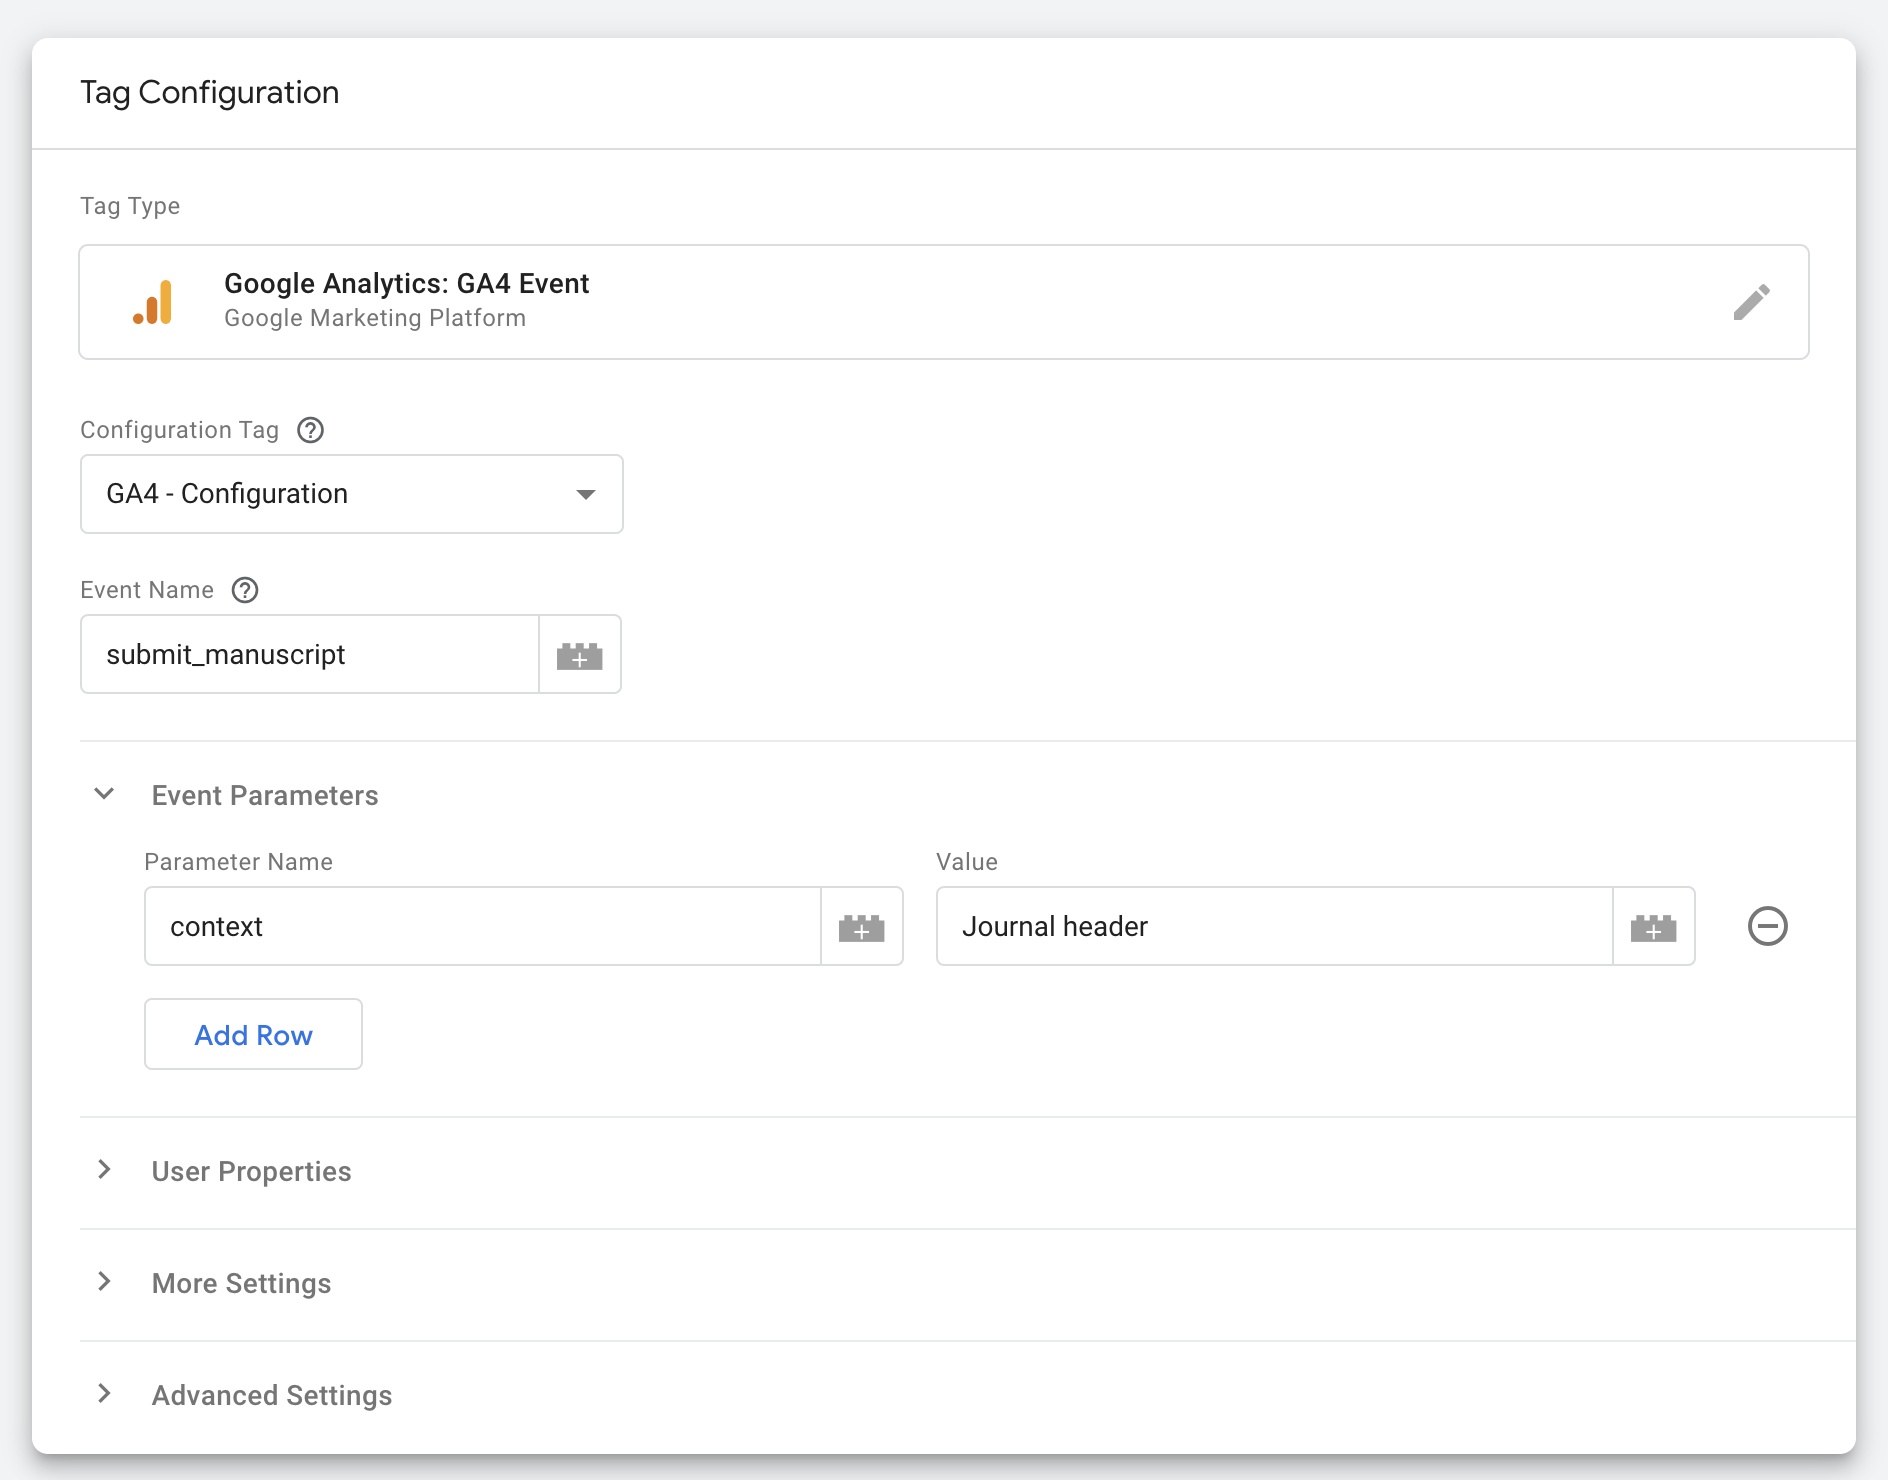
Example SpringerNature custom event tag:
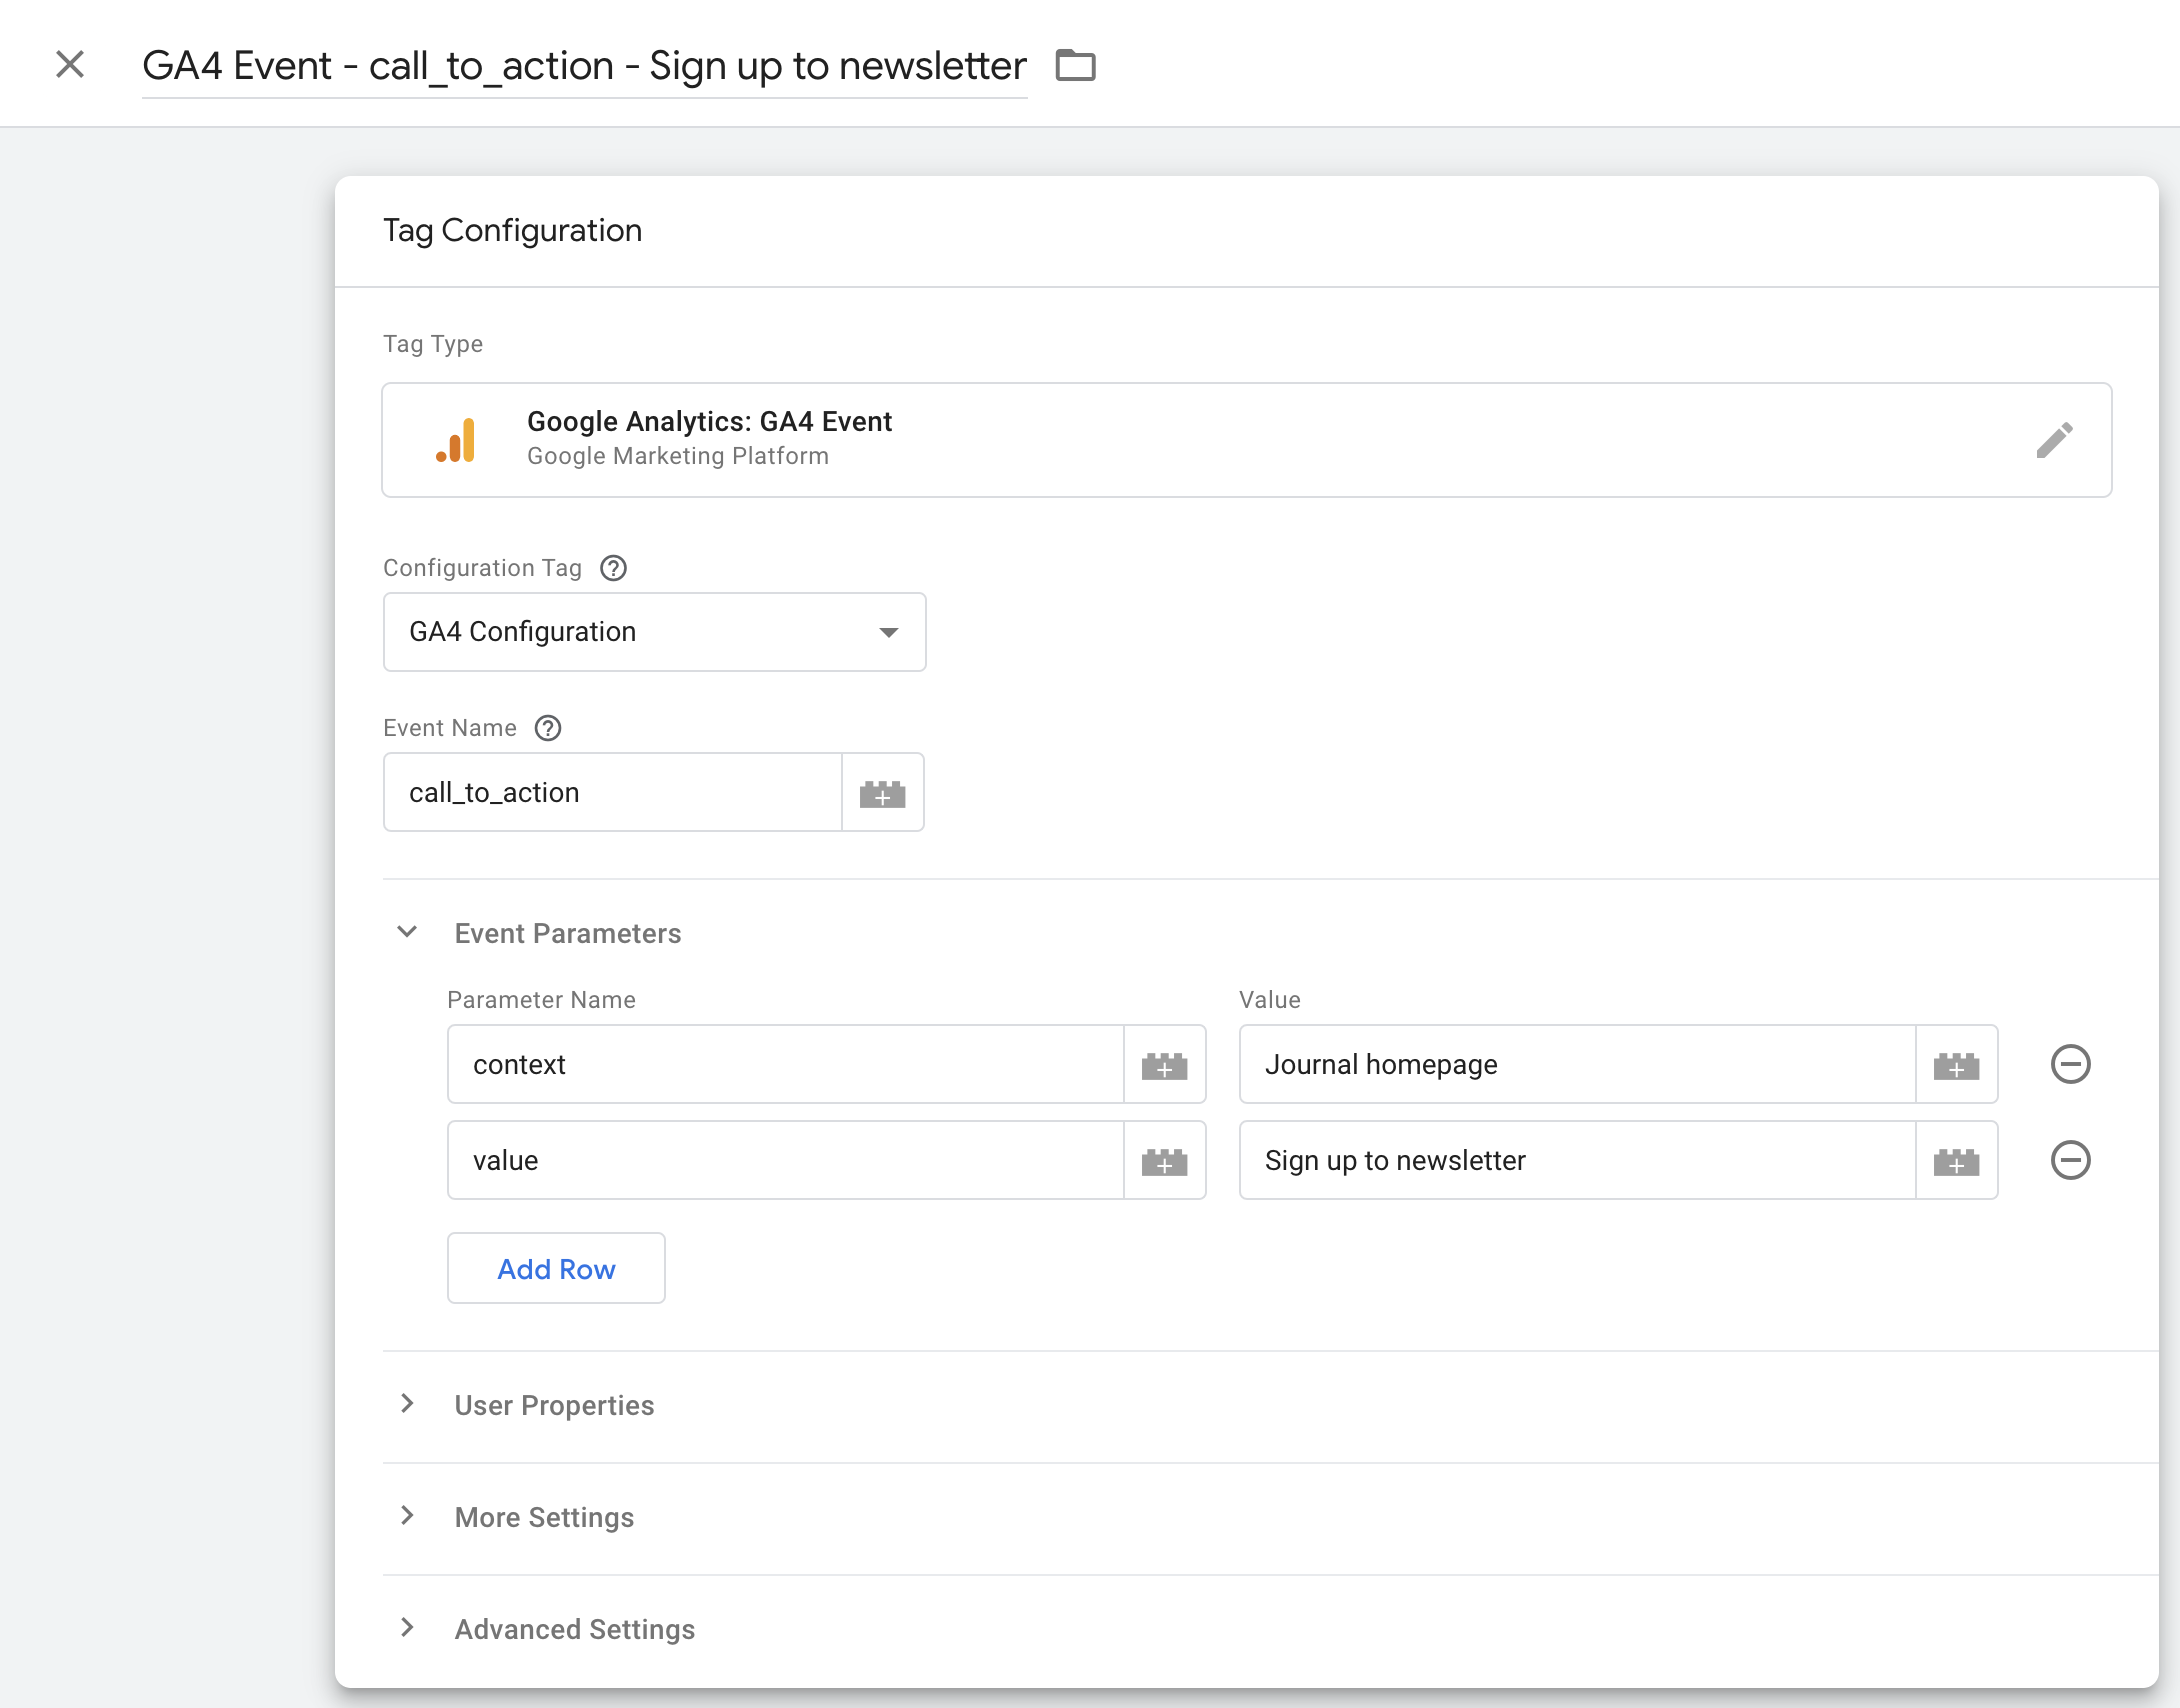
Example other custom event tag:
Ensure that the tag only fires if the user has consented to the appropriate category.